
Notes on the Student Card are an effective way for you to leave communications for other educators about student progress.
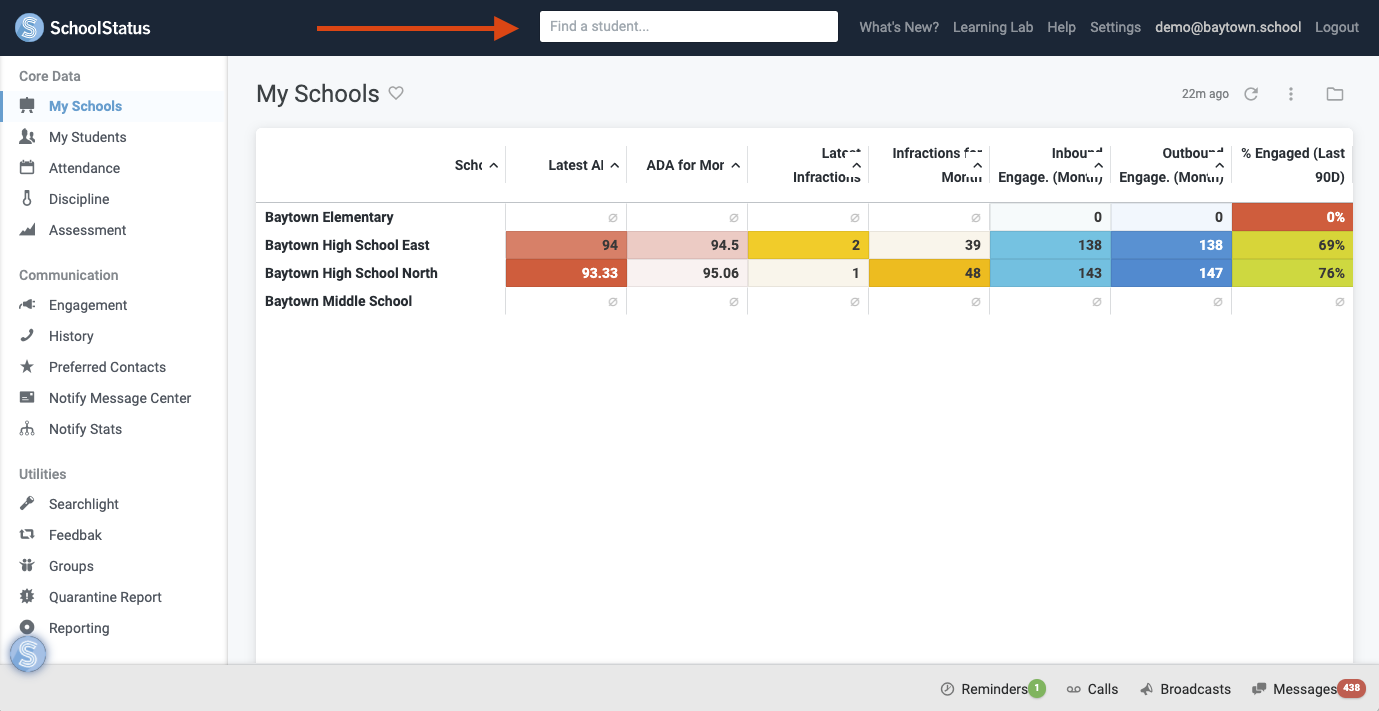
To get started, you will want to first find the student for whom you would like to create a note. To do this, just type the student's name in the search bar at the top of the page.
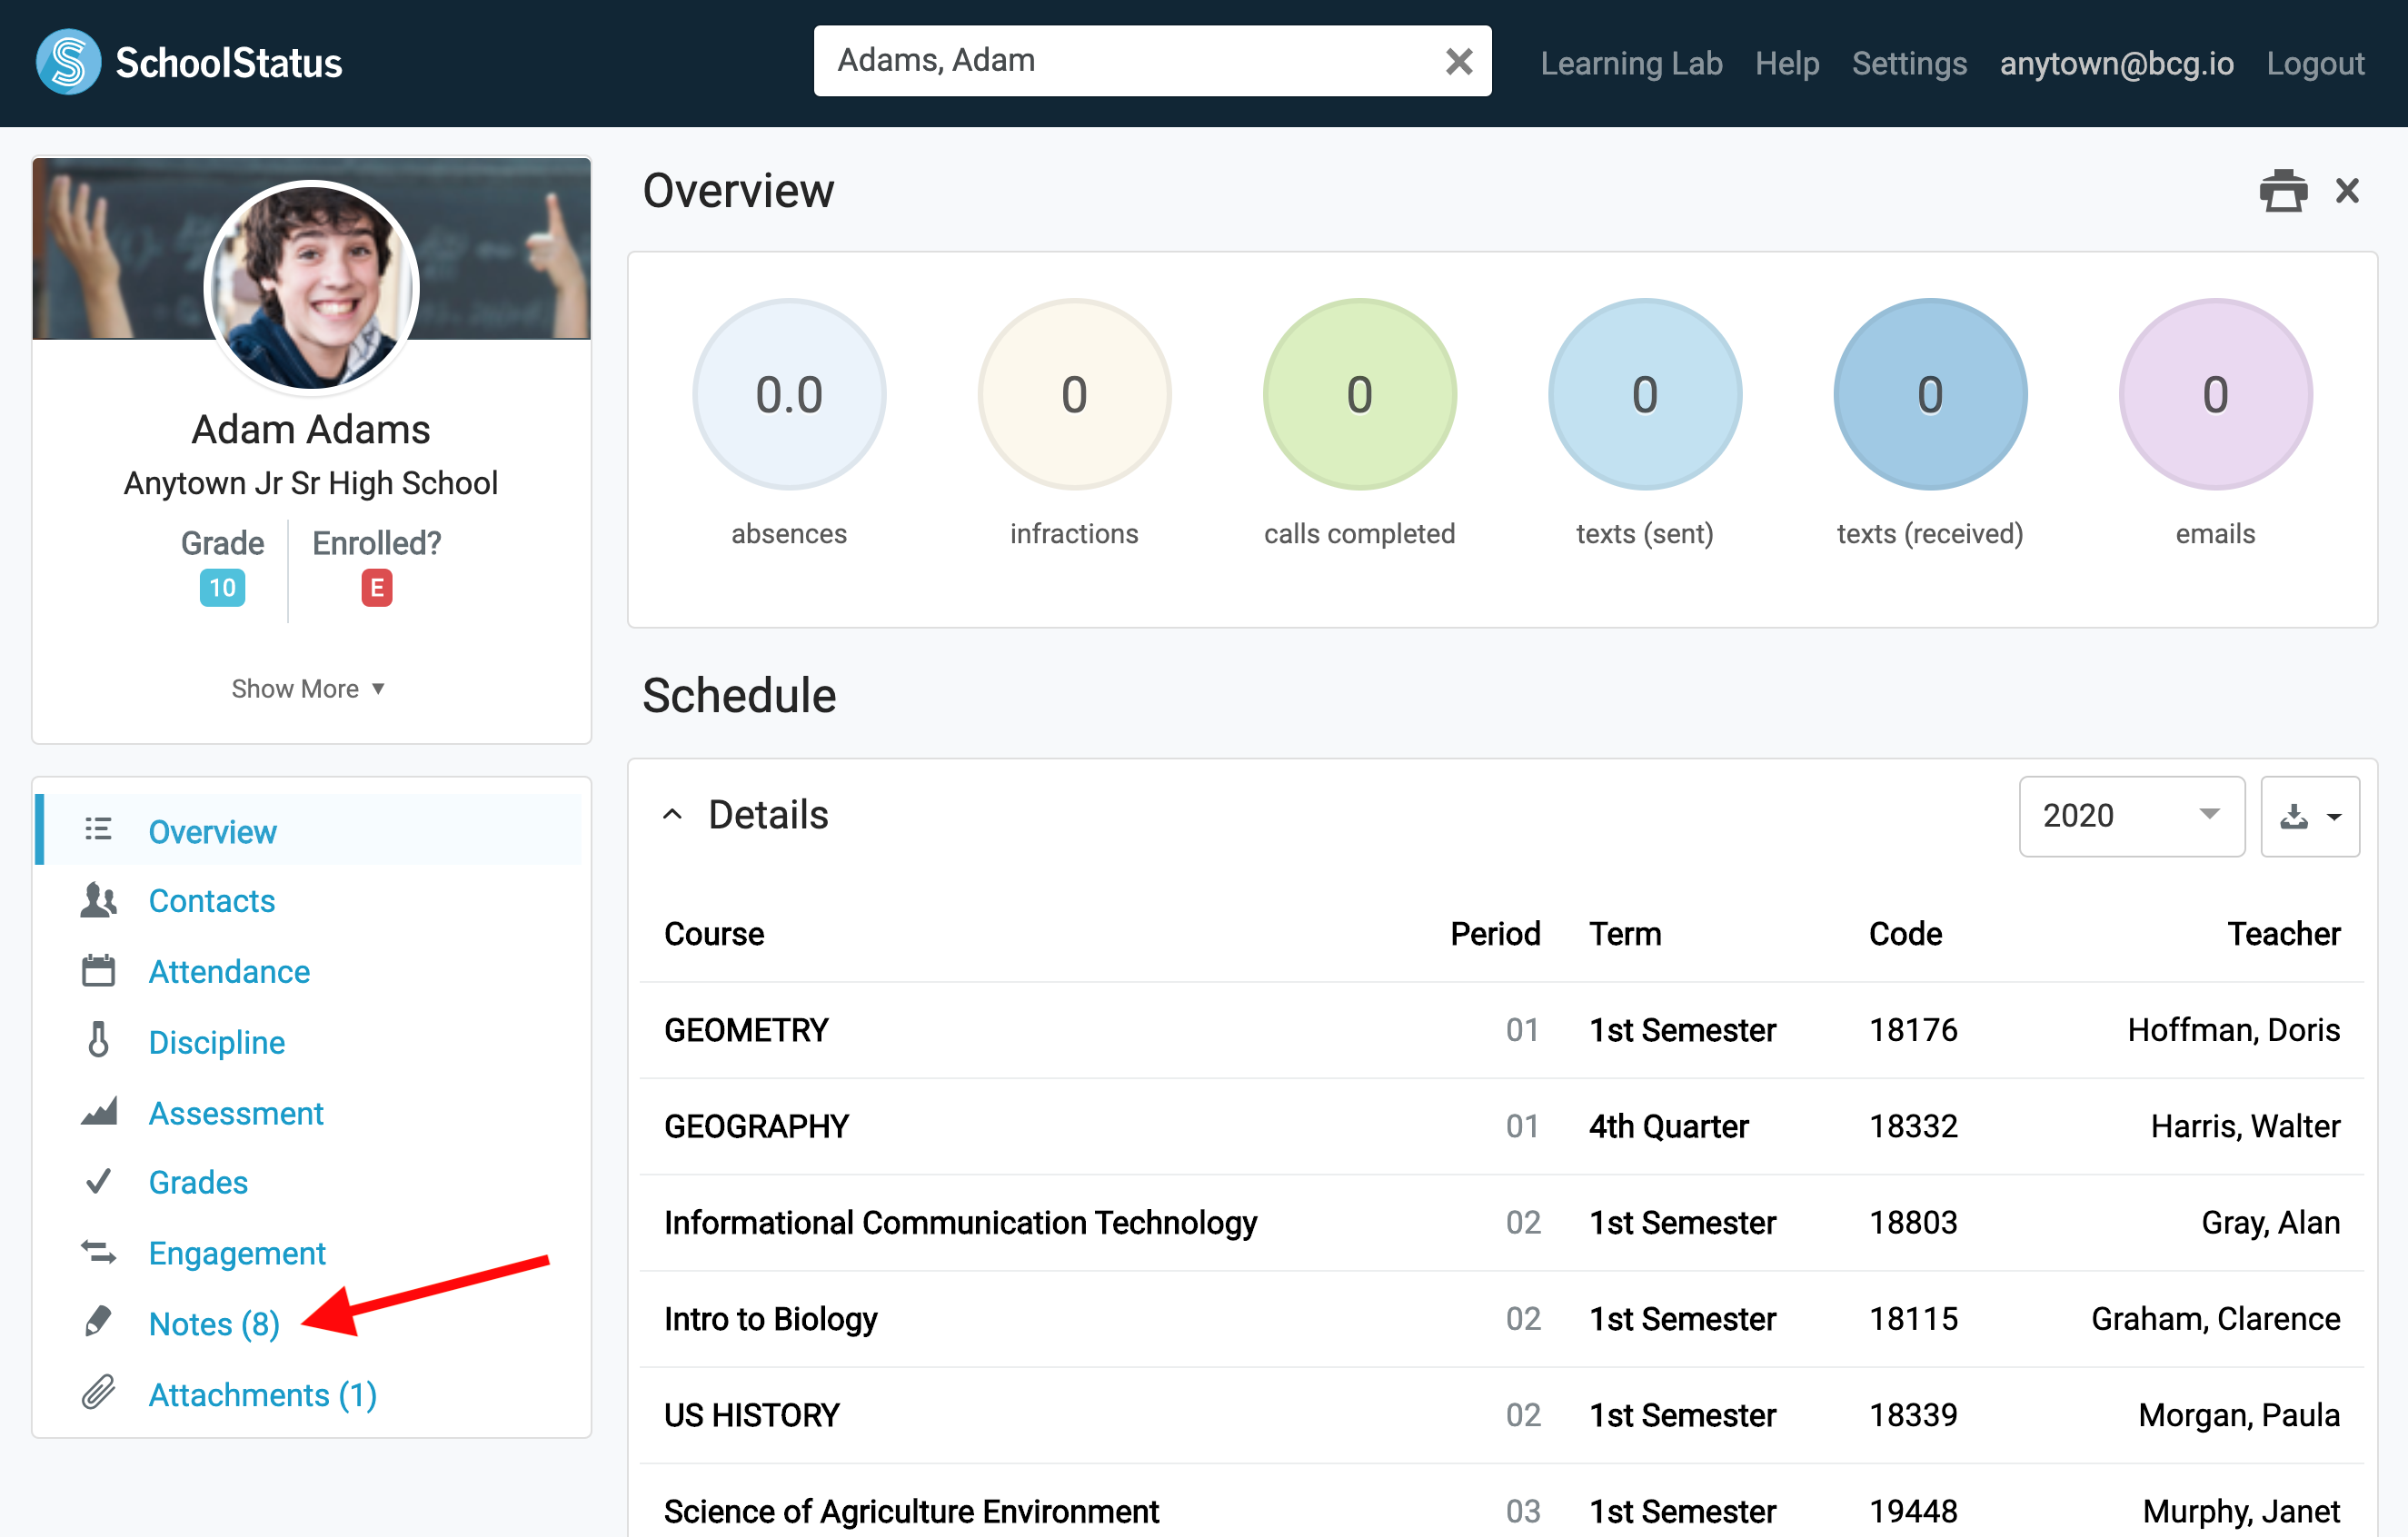
Then, on the Student Card, click the Notes icon on the left side of the page. Notice the number in the red box next to the word, which tells you the number of existing notes a student has on file.
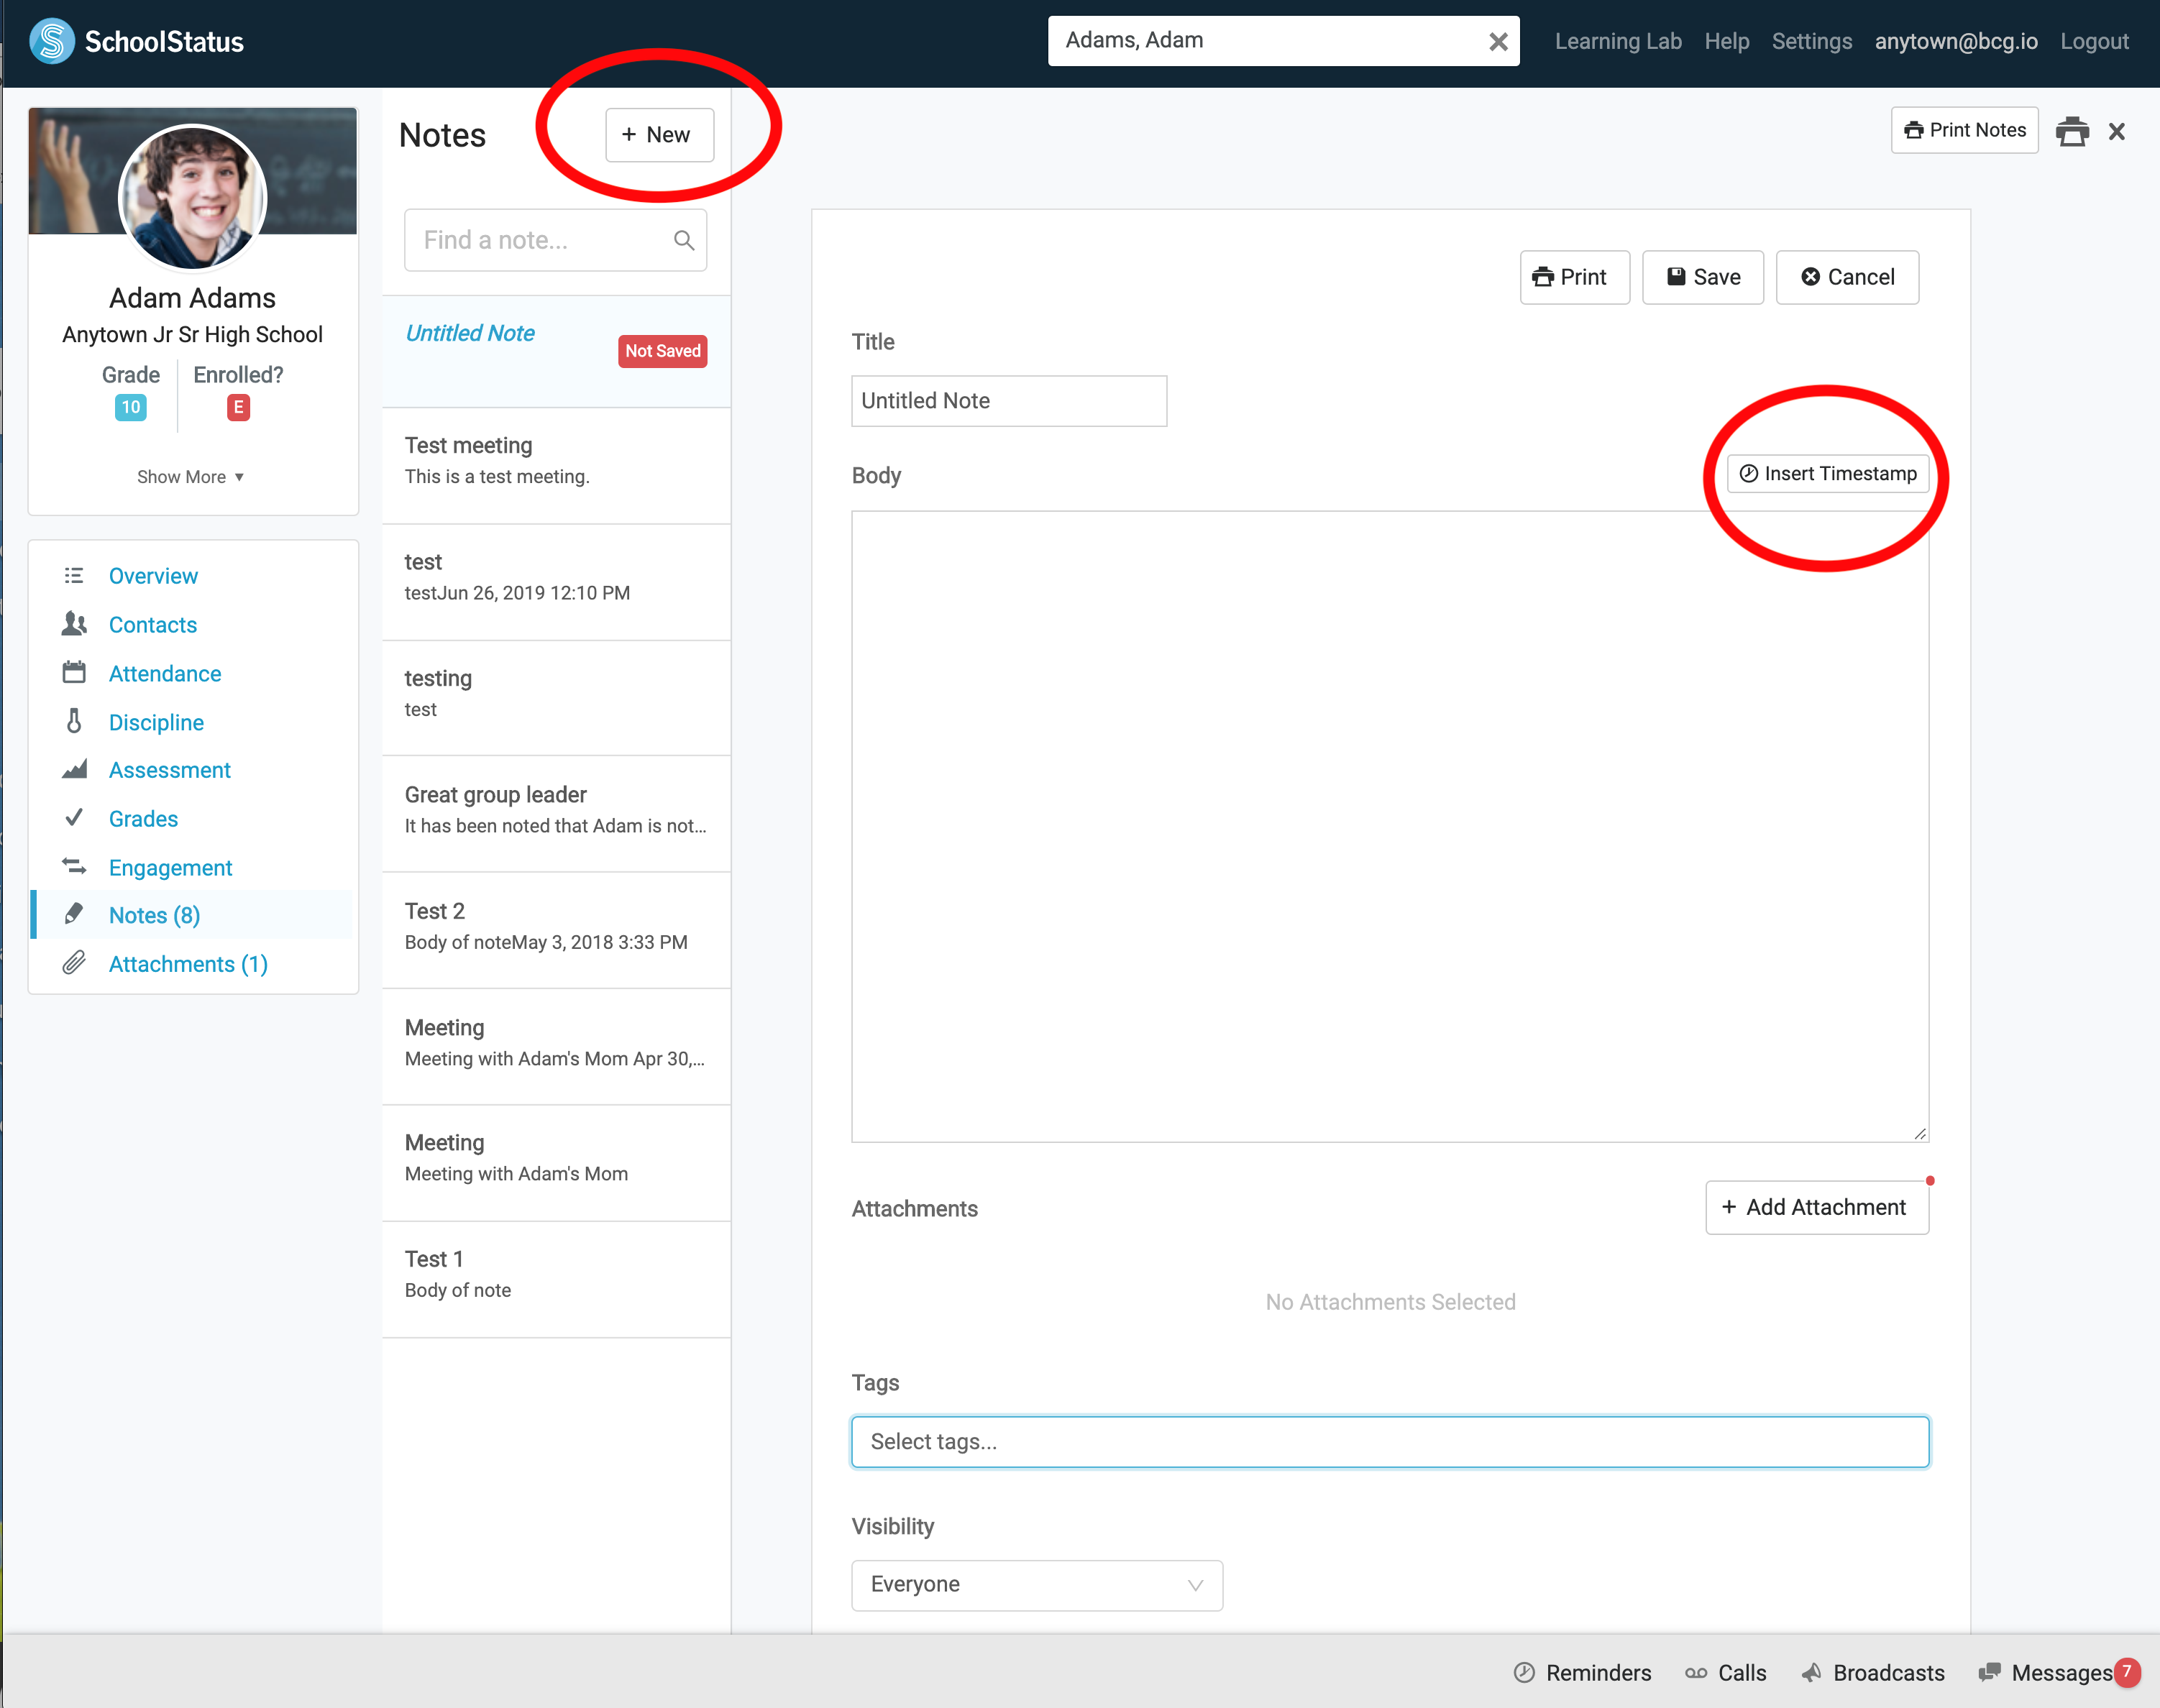
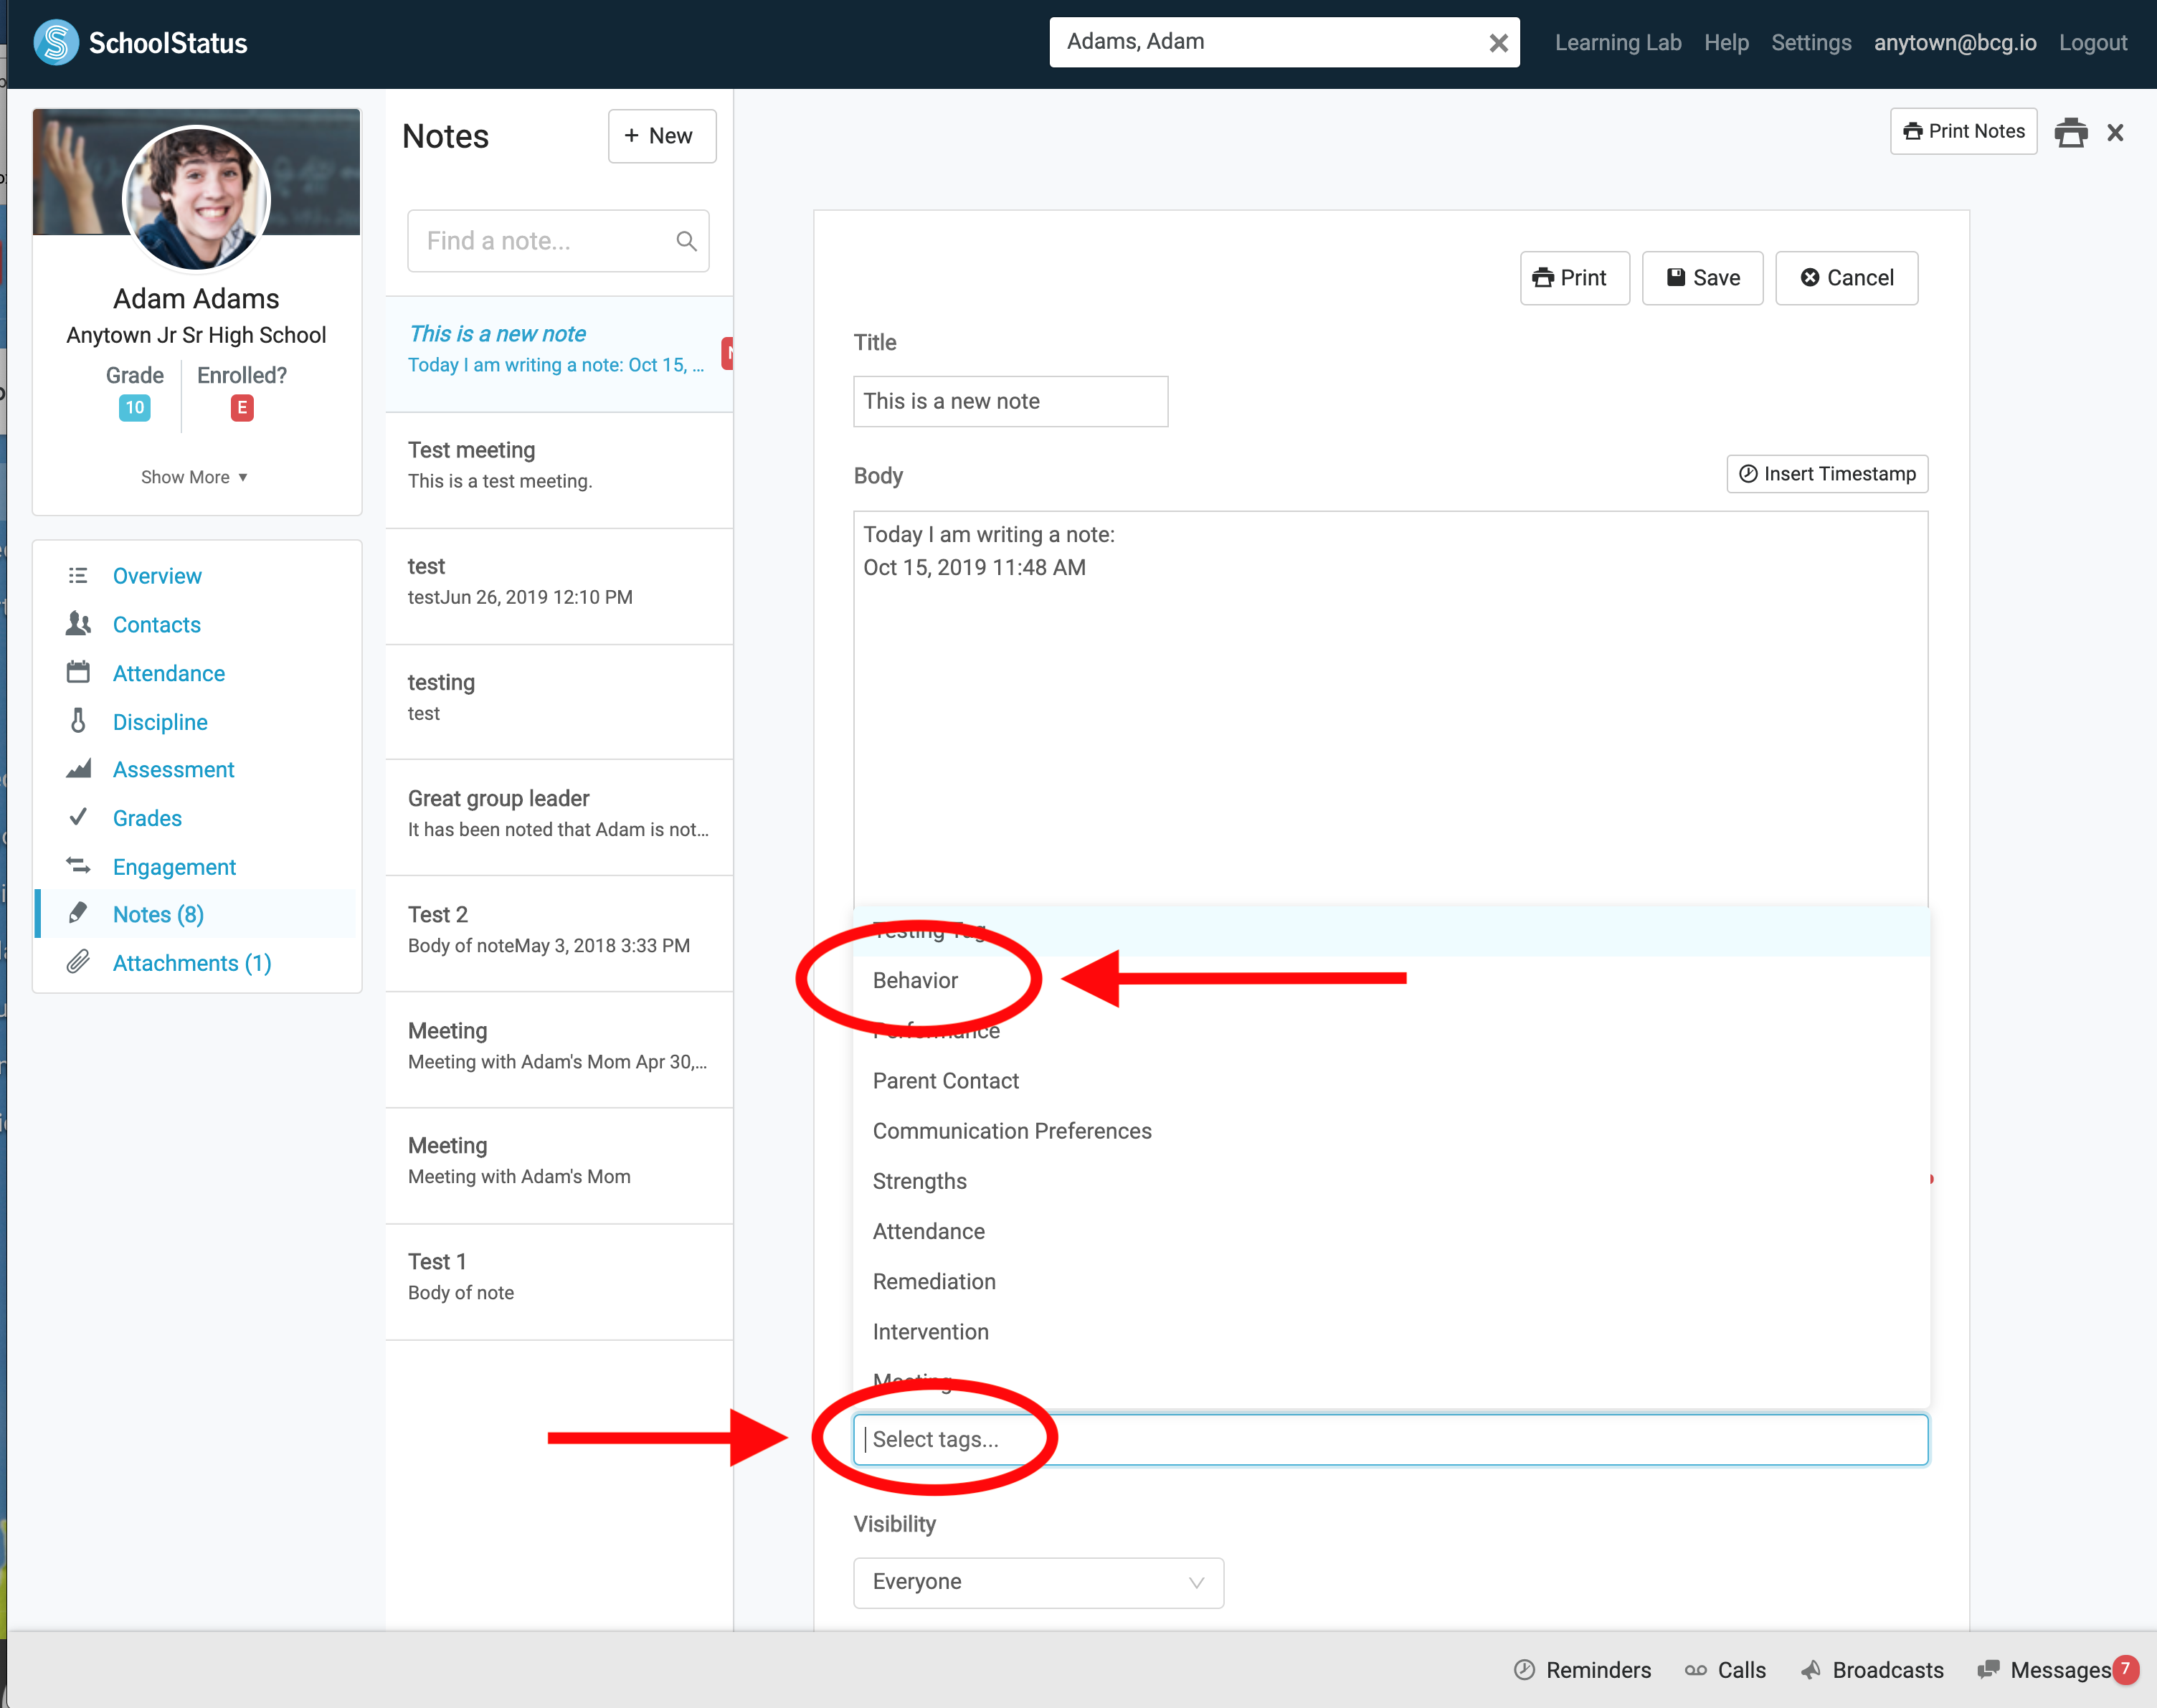
You can also Tag your Note. To do this, just click in the Select Tags box and choose a tag, or several, from the list. Once you have selected your tag(s), you can click off of the list and the tag(s) will be listed in the box. If you need to remove a tag, you can click the X beside each tag.
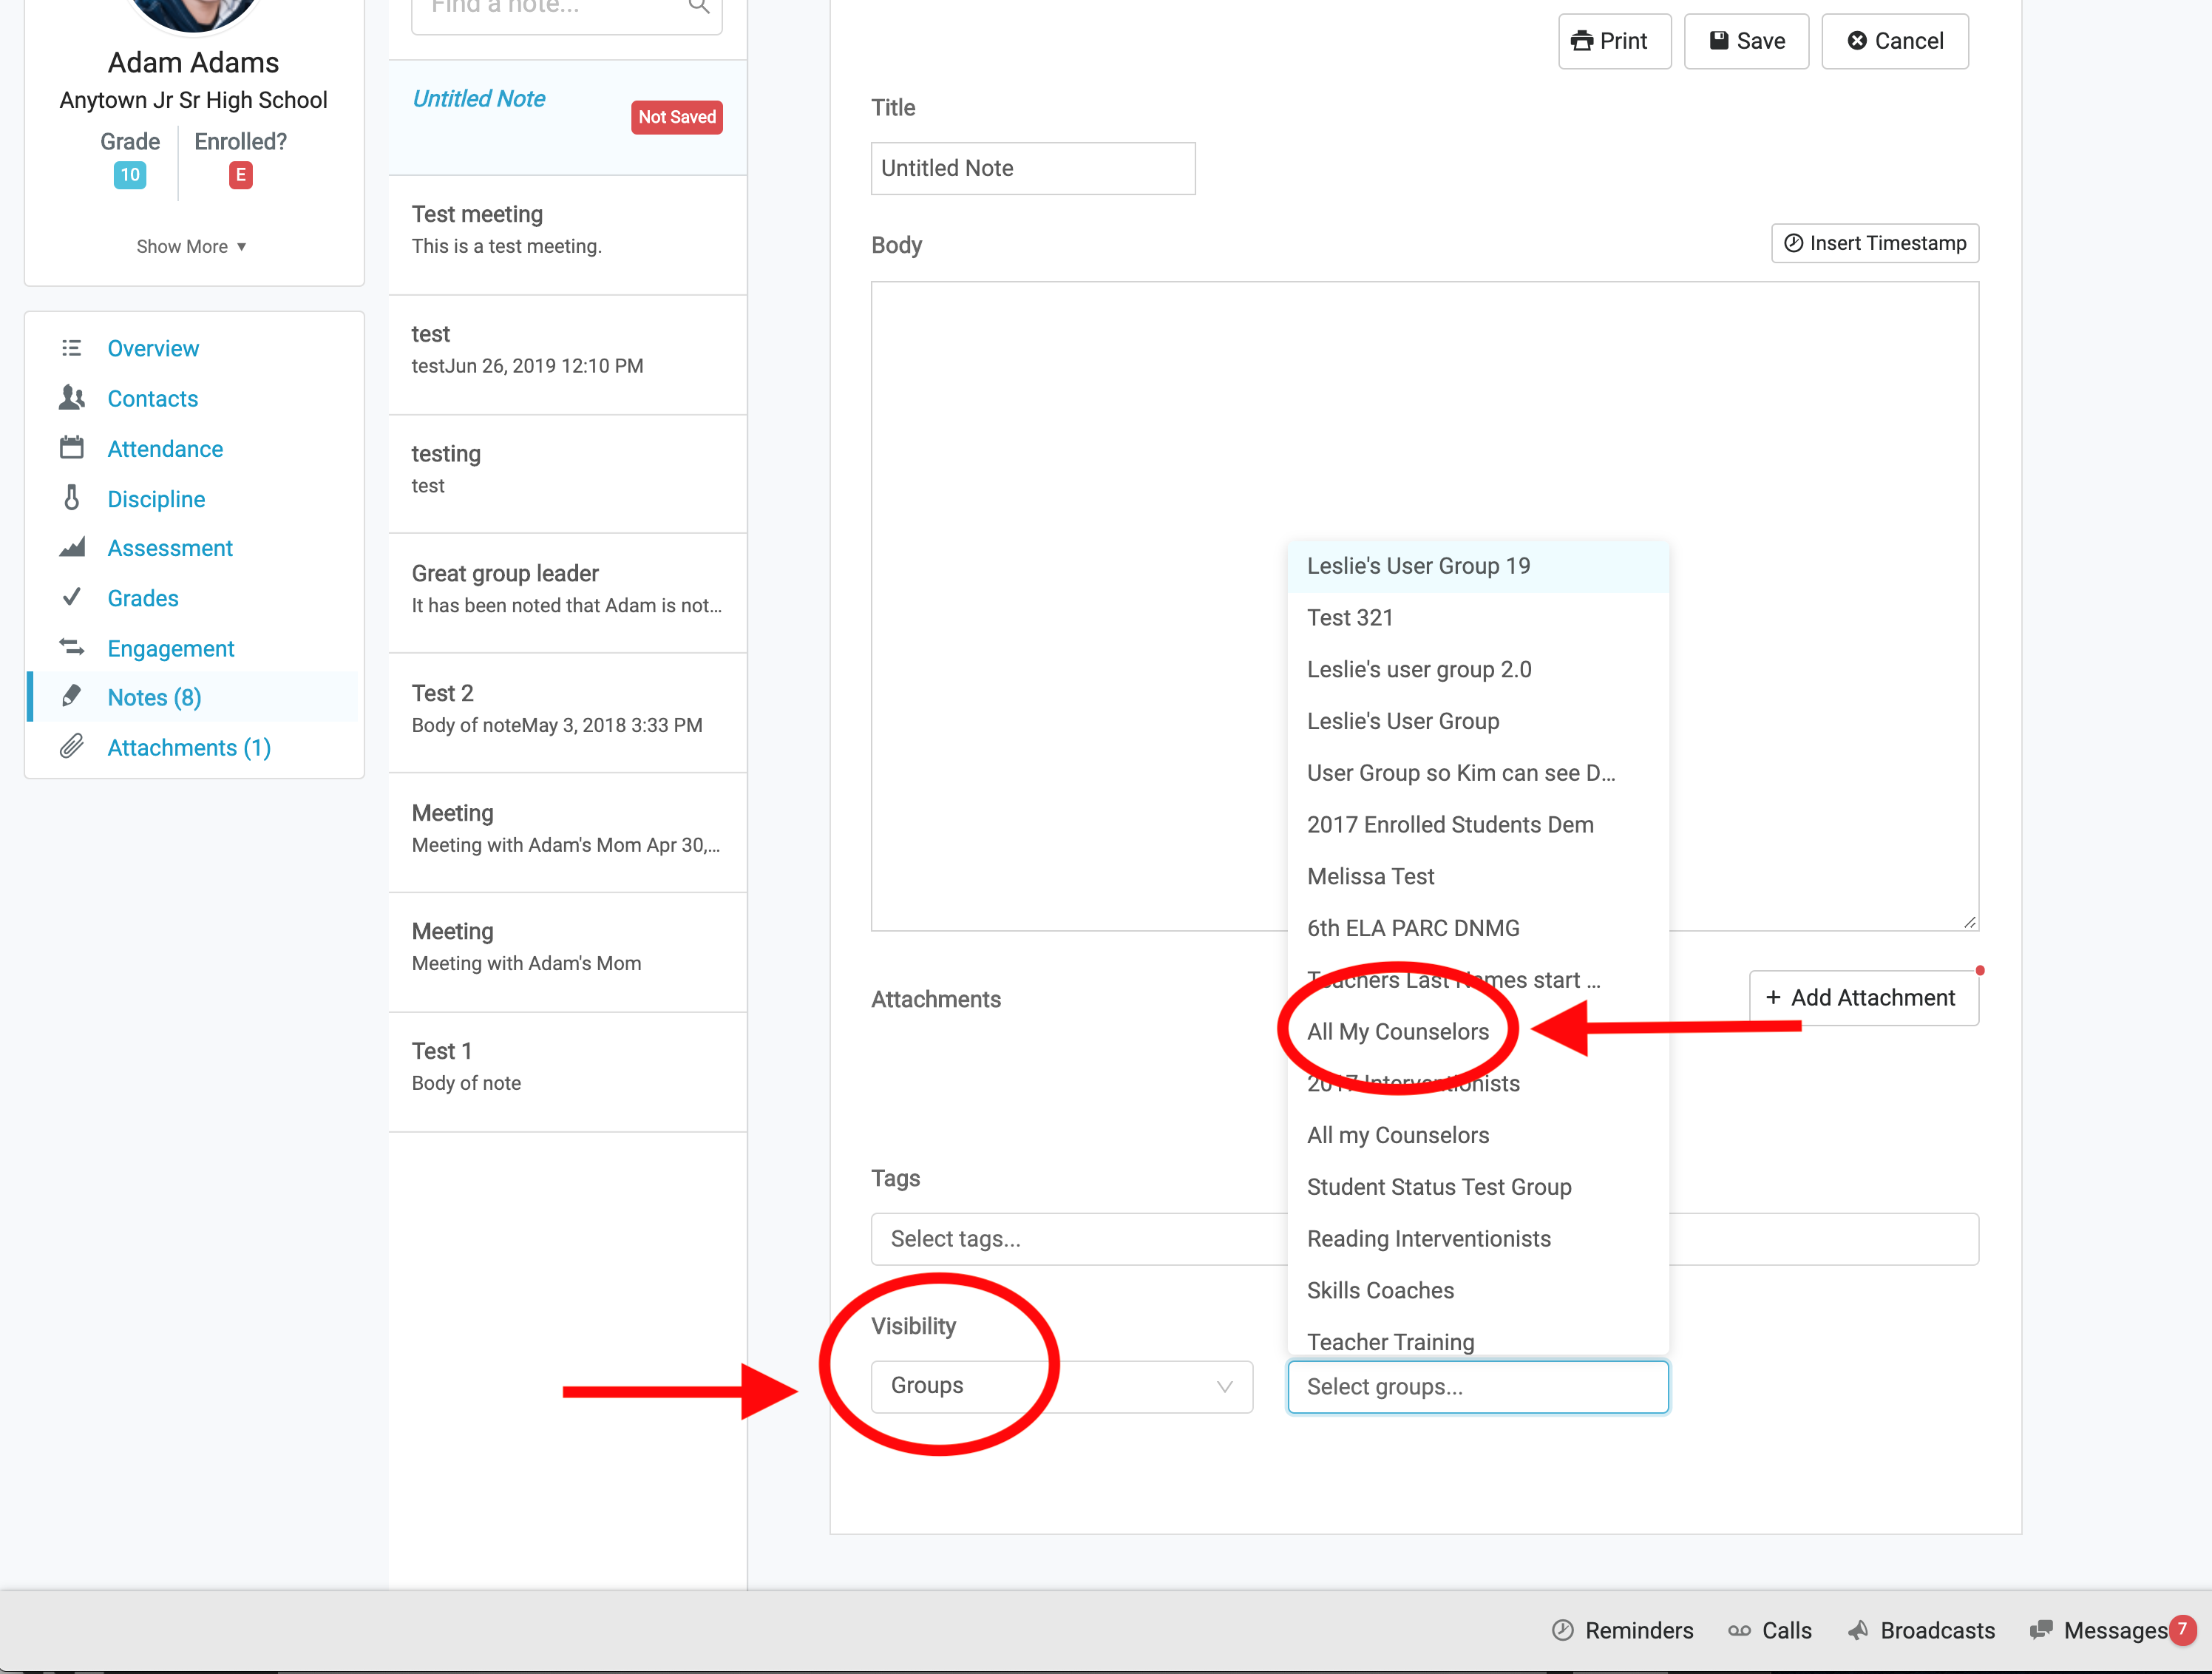
When you are finished with the information you would like to share with your team, you can choose to make that visible to Everyone (meaning everyone who has access to this student) or Groups. If you choose Just Me, this Note will only be visible to you.
If you choose Groups, you will be allowed to search for and choose the Group in the next search box. The information in your note is shared with your selected audience. If you chose a group, the note will only be visible to the members of that group. Parents and Guardians could potentially see those records as well, if they are requested.
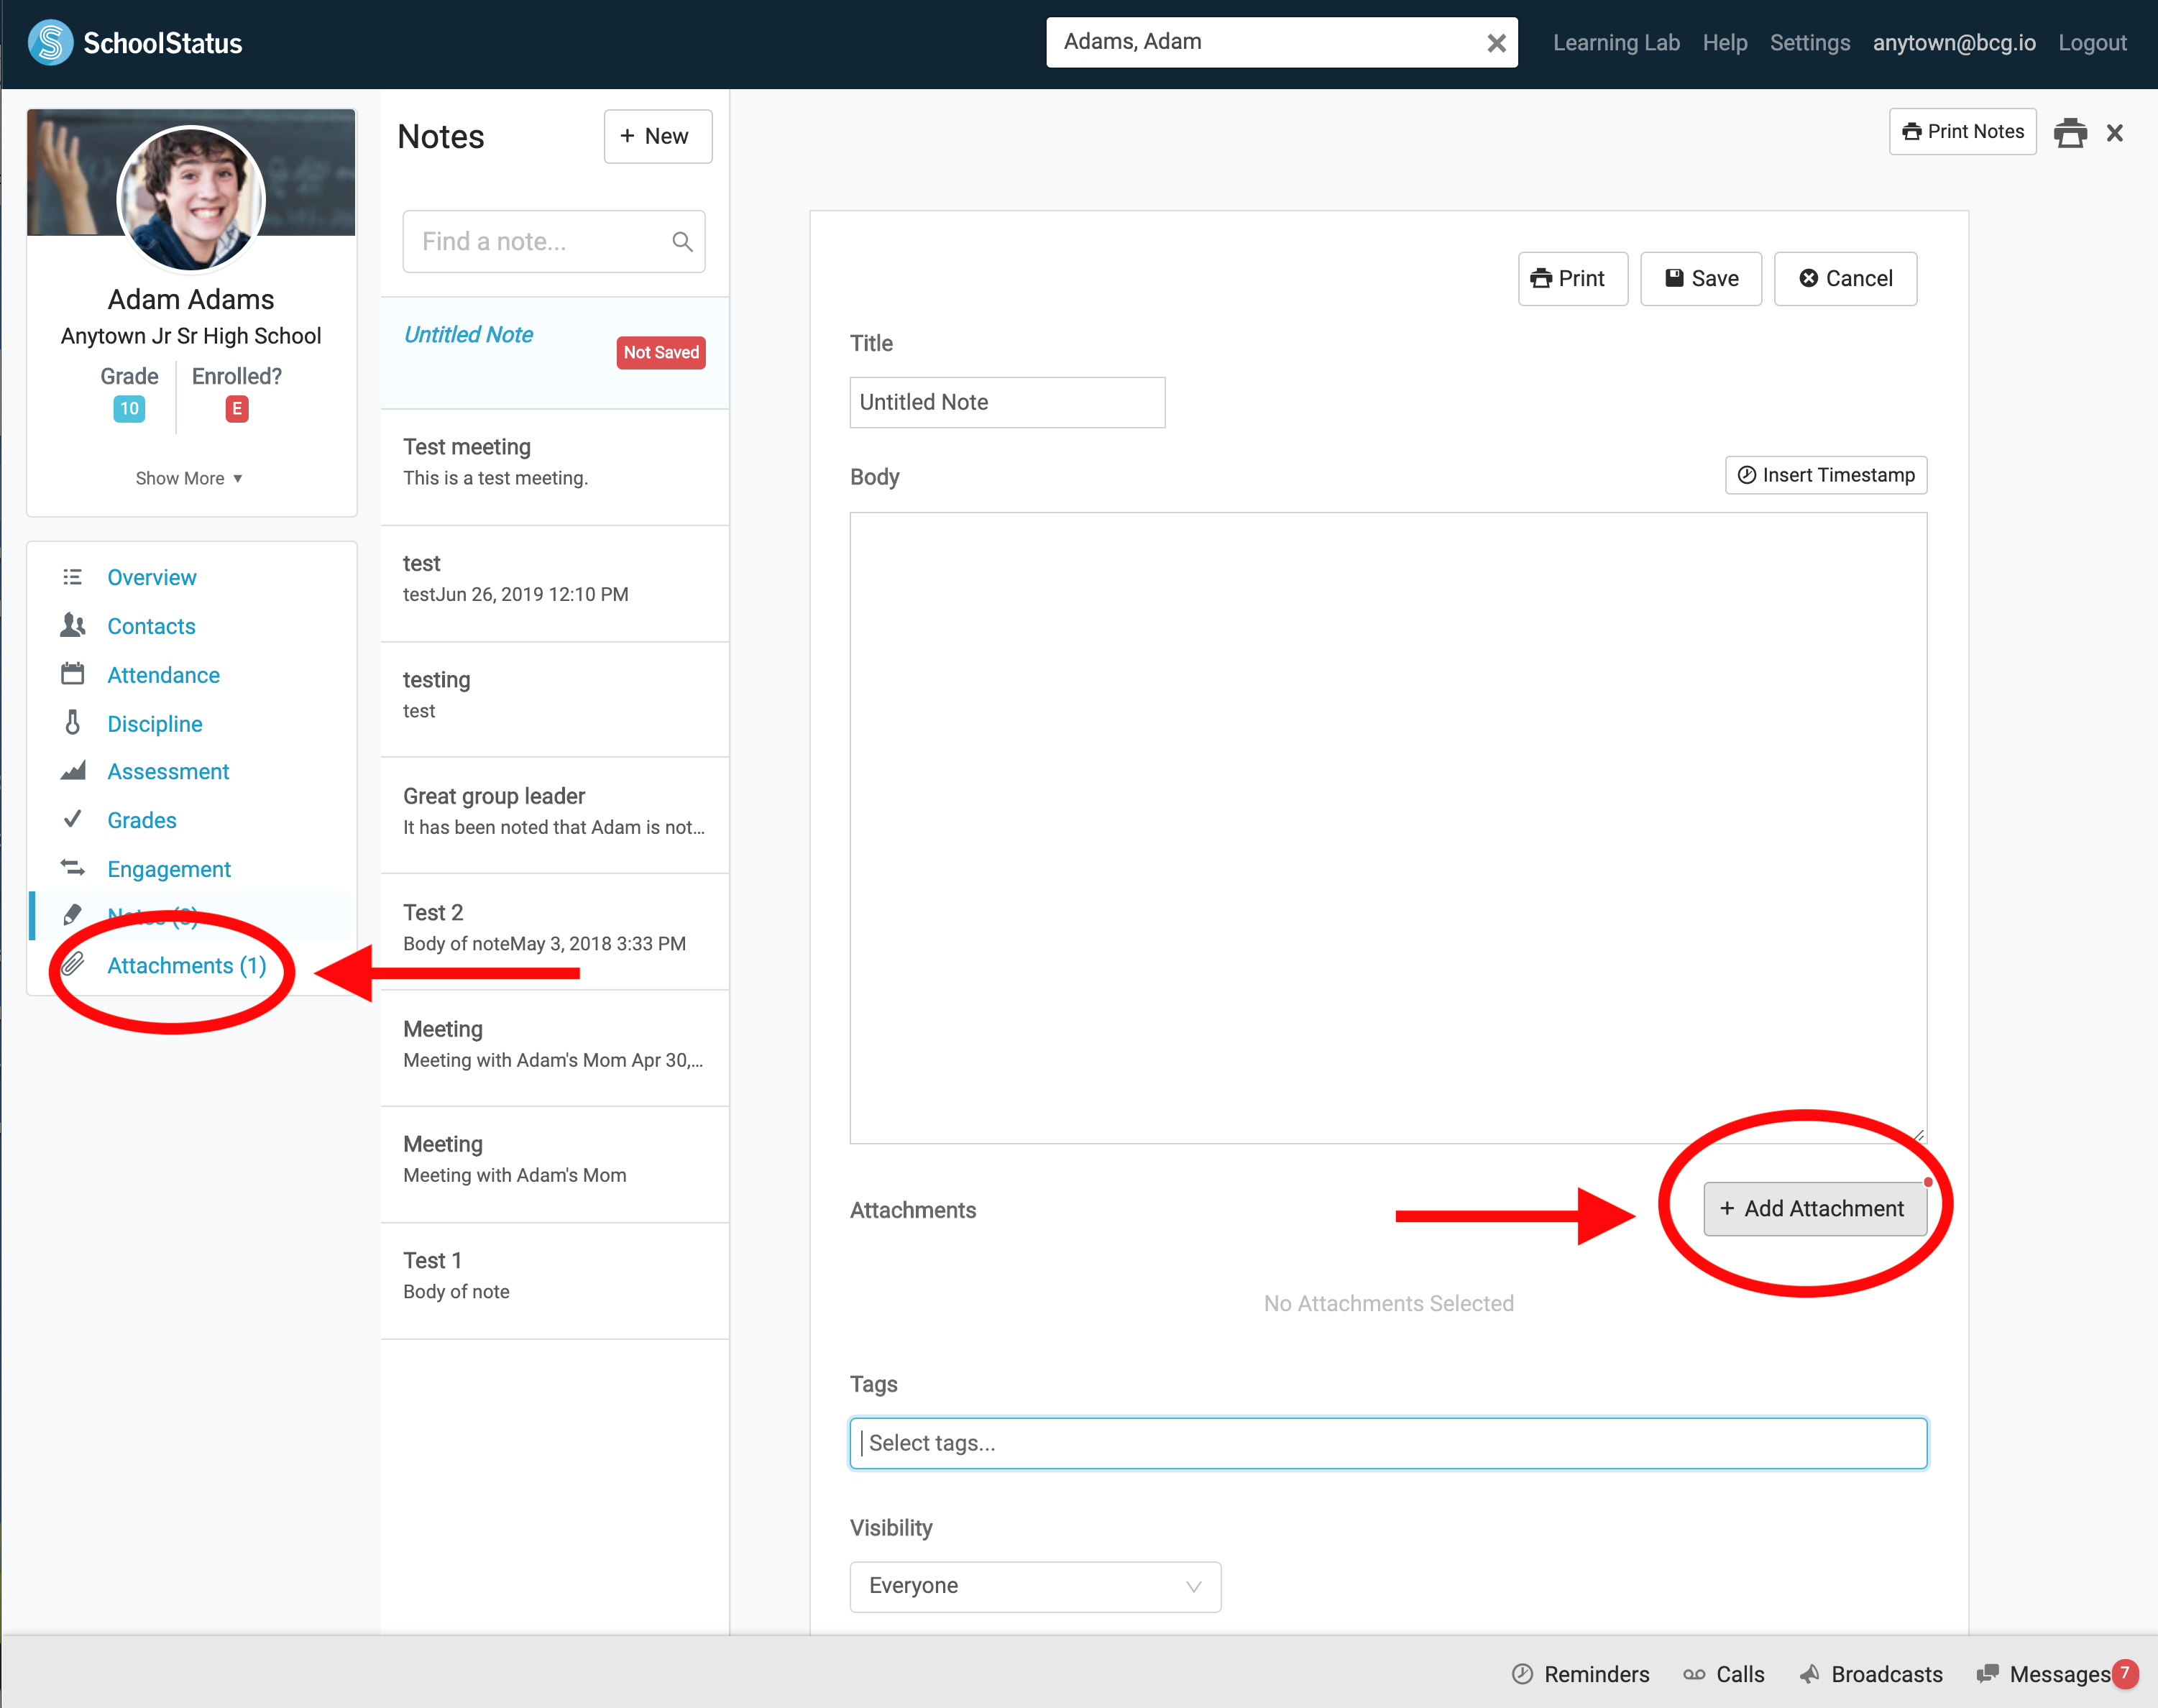
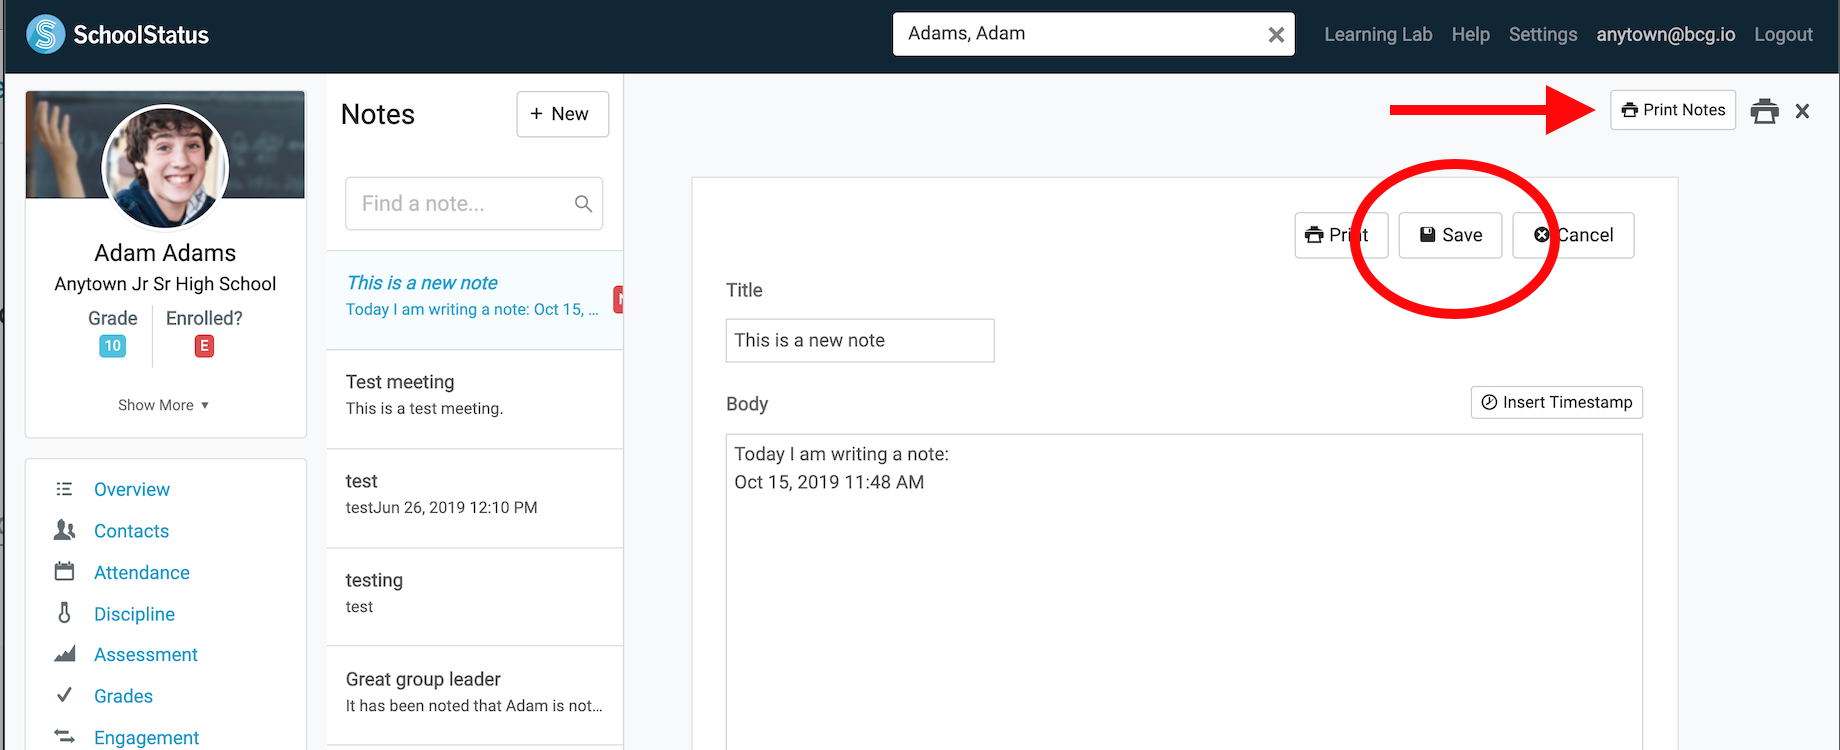
When you are finished, click Save to save your Note. You can also print or export your notes.
These notes are persistent with the student and will follow the student as they progress from year to year. Now that you have mastered Notes, click here to learn more about the Student Card.
Click here to return to the main menu- or ask for help!